
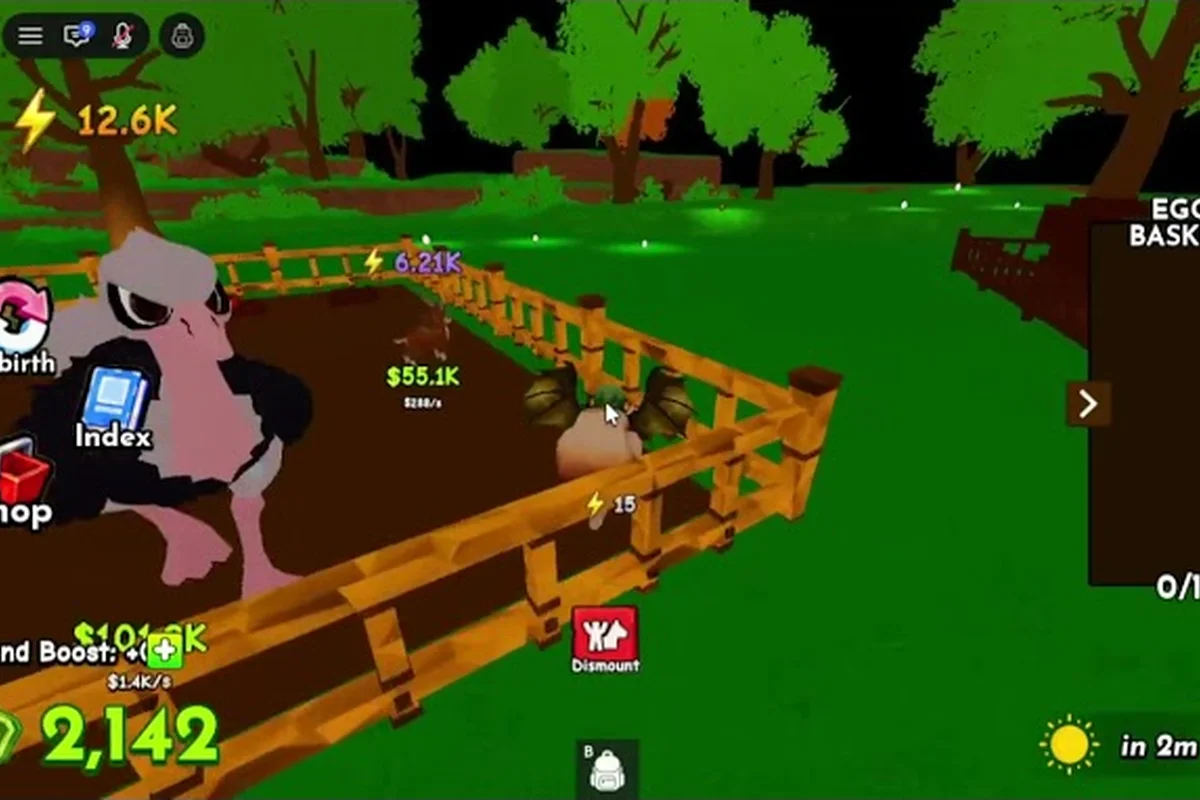
The Ride A Pet best start comes down to one decision made in the first ten minutes: which egg you commit your early cash to. According to the this hatch video, every hatch produces a mount whose only real stat is its displayed MPH, and rarer eggs hatch into faster pets that unlock rarer eggs. That single loop defines your first hour, so this Ride A Pet speed guide walks through exactly what to do, which eggs to keep, and which traps drain your cash before you ever see a real speed spike.
Reading the Mound Before You Spend a Single Coin
Most new players sprint toward the nearest nest and burn everything on whatever egg glows the brightest. That habit is the single biggest reason early rosters stall out. The mound is randomized each server, but the egg tiers on top of it always follow the same price curve, and the curve is what tells you what your budget can actually afford to skip.
Cash Curve and Hatchable Eggs in the First Hour
| Cash Available | Cheapest Affordable Egg | Expected Mound Odds | Best Use of Cash |
|---|---|---|---|
| 0 – 500 | Common Egg (free / near-free) | Common 70%, Uncommon 25%, Rare 5% | Spam for movement; do not chase mutations |
| 500 – 2,500 | Uncommon Egg | Uncommon 55%, Rare 35%, Epic 10% | First real speed upgrade window |
| 2,500 – 8,000 | Rare Egg | Rare 50%, Epic 35%, Mythical 15% | Where most players should park their first hour |
| 8,000+ | Epic Egg | Epic 45%, Mythical 40%, Legendary 15% | Only if you can already afford a re-roll on a bad pull |
The table above is built from community data reported on YouTube tier breakdowns like this community hatch video, where dozens of mound pulls were logged and the tier distribution held roughly stable across servers. Treat the percentages as a guide, not a guarantee: pet RNG is still RNG, which is exactly why a cash curve matters more than a single lucky pull.
The "Never Buy This on Hour One" List
A handful of decisions feel productive in the first ten minutes but quietly bleed your cash before your first mount ever breaks the double-digit MPH threshold, and the trap is that each one looks like progress on paper — stacking Commons fills your inventory bar, cosmetics show off on screen, rebirths feel like a prestige unlock, and Legendary eggs promise a shortcut past the slow grind on nest routes. The real cost is opportunity: every coin sunk into a 0.5x base-speed pet or a Common you will never equip is a coin that did not buy hatch speed, saddle upgrades, or a faster tier-2 egg from the Desert Nest. Hold the line until your starter mount is comfortably clearing 10+ MPH, then revisit cosmetics, rebirth math, and Legendary hatches with the multiplier cushion to make those choices actually pay off.
-
Stacking identical Commons to "fill the team" — there is no team. One mount, one slot, the rest are inventory clutter.
-
Buying cosmetics or trails before you have a real mover. Cosmetics never raise MPH, and the trail slot is wasted on a slow base.
-
Rebirthing at sub-1,000 lifetime distance. Rebirth multipliers are calculated off total distance, so a rebirth on a Common mount resets the curve with a worse baseline.
-
Chasing Legendary eggs with starter cash. The drop rate at that tier is brutal, and a single dry streak deletes an hour of progress.
If you are unsure how much cash your current route is actually producing, the cash farming walkthrough breaks down which nest loops pay the best for a low-MPH mount — including the per-loop coin averages across the Forest, Desert, and Ice nests so you can see whether your starter is earning enough to justify skipping a 2x hatch speed upgrade in favor of cosmetics or rebirths before crossing the 10 MPH baseline.
How to Level Up Fast Without Wasting Hatches
The fastest way to gain MPH in your first hour is not hatching more — it is hatching smarter while the early nests are still dense. Each lap around the map gives you both lifetime distance (which feeds rebirth multipliers) and small cash drops, so the loop is to keep moving, not to camp the spawn mound.
A 60-Minute Ride A Pet Speed Guide by Phase
| Phase | Time Window | Main Goal | Egg to Spend On | Target MPH by End |
|---|---|---|---|---|
| Warm-up | 0 – 10 min | Unlock movement, learn nest loop | Common Egg spam | 8 – 12 MPH |
| First Real Mount | 10 – 25 min | Replace starter with fastest Uncommon pull | Uncommon Egg rolls | 18 – 28 MPH |
| Speed Spike | 25 – 45 min | Hit a Rare or better | Rare Egg priority | 40 – 65 MPH |
| Plateau Push | 45 – 60 min | Save for Epic roll, prep for rebirth | Rare + Epic mixed | 80+ MPH on a lucky pull |
The numbers above are the realistic community-reported range, not a guarantee. According to the strongest-pet community footage on this hatch video, top-tier mounts can already push past 100 MPH inside the first hour if the Rare-to-Epic transition lands cleanly. If your pull stays mid-tier, that is still a successful first hour — the goal is a mount that outruns your starter, not a leaderboard pet.
Travel Habits That Quietly Double Your Cash
A faster mount is only half the speed equation. The other half is route efficiency, because every nest you skip is a hatch you cannot afford. Two habits, applied early, make a measurable difference: chaining your loop around two or three adjacent nests on a single lap cuts the average walking segment in half, so a 12 MPH mount spends more of its clock on the egg circle itself and far less on the dead sprint between respawn points.
-
Loop the same cluster three times before moving on. Most nests respawn on a short timer, and three loops is the sweet spot where respawns start overlapping with your current lap.
-
Prioritize nests near your current MPH ceiling. A slow mount burns more time reaching far nests than the nest is worth in cash, so stick to the densest part of the map until your speed catches up.
These two rules are what separate a player who hits a Rare by minute 30 from one who is still grinding Commons at minute 45. The same loop, run tighter, produces almost twice the cash over the same wall-clock hour.
Why Two Pets Are Enough to Start
Once you have three or four hatches sitting in your inventory, the next decision is what to actually keep. Most rosters in Ride A Pet are not built by holding the rarest pet — they are built by holding the right two pets while everything else sits in storage as a stat backup.
Active Mount vs. Mutation Hold
| Slot | Purpose | What Belongs Here | When to Replace |
|---|---|---|---|
| Active Mount | The pet you ride right now | Fastest MPH you own | Only when a clearly faster pull drops |
| Mutation Hold | Insurance / future trade / showcase | Rarest pet you have, even if slow | When a rarer pull replaces it |
The reason this matters in the first hour is that upgrading your Active Mount is the only action that changes how fast you earn cash, distance, and better eggs. Everything else in your inventory is a future-project. Players who keep rotating the active slot based on the freshly hatched MPH end the hour with significantly more map coverage than players who ride a "favorite" pet for sentimental reasons.
What "Fastest Pull" Actually Means in Numbers
Speed in Ride A Pet is additive in a way that surprises new players. A 35-MPH Rare will outrun a 50-MPH Epic on display only if the Rare has a trail or mutation bonus stacked on it, which is why the displayed number is the stat that matters. When comparing two candidates for your Active Mount slot, sort by displayed MPH with all modifiers active — never by egg rarity alone. This is the exact comparison logic used in the pet roster breakdown when the community ranks which pulls are actually worth the inventory slot.
If you want a deeper look at how the slot and trail system compounds your MPH over multiple play sessions, the upgrading and pet slots guide goes into the long-term math. For the first hour, the rule is simple: fastest displayed MPH wins the slot, slowest displayed MPH becomes your Mutation Hold.
Egg Priorities When Cash Is Tight
Even with a perfect loop, there will be moments when the mound is offering a Rare and your wallet is offering you a Common. The mistake is to spend the cash anyway and reset your curve. The smarter move is to keep the cash, take one more lap, and come back when the numbers actually line up.
Should You Save for the Egg Above Your Budget?
| Current Cash | Egg You Want | Egg You Can Afford | Best Call |
|---|---|---|---|
| 1,200 | Rare (2,500) | Uncommon (500) | Afford a 2x Uncommon pull — two chances at speed for the cost of one Rare |
| 4,500 | Epic (8,000) | Rare (2,500) | Spend on Rare now, save the rest for Epic |
| 7,200 | Epic (8,000) | Rare (2,500) | Wait one more lap — almost at Epic threshold, do not lock in a Rare |
| 9,000+ | Mythical | Epic | Spend on Epic — Mythical odds are not worth skipping Epic entirely |
The pattern above is what most experienced players follow, and it shows up consistently in the egg tier and unlock guide as the standard first-hour approach. The short version: if you can afford two of your current egg tier, spend; if you are within one short loop of the next tier, wait; otherwise keep moving and let the cash build.
When to Stop Spending on Eggs Altogether
By the 45-minute mark of your first hour, your rebirth readiness becomes a real factor. If you are approaching a rebirth threshold — usually a lifetime-distance milestone — it is smarter to stop spending on eggs entirely and just run loops. The multiplier you gain on rebirth is worth more than another mid-tier hatch, and a successful rebirth resets your curve with a better baseline. The exact thresholds, costs, and multiplier math are covered in the rebirth strategy guide, but for the first hour the rule is: once you smell a rebirth window, stop feeding the mound and start running distance.
Common First-Hour Traps (and What to Do Instead)
The first hour of Ride A Pet is short, and most of the mistakes that hurt rosters long-term happen in this window. Five traps come up again and again in community data, and each one has a simple, Ride A Pet speed guide-friendly fix.
Trap 1: Spending Rebirth Cash on a "Sure Thing" Pull
The pull will not be a sure thing. Pet RNG does not care about your budget, and a single Legendary attempt on a low cash base is the fastest way to lock yourself out of a rebirth for another full session. Save the cash, take the rebirth, and roll with the multiplier.
Trap 2: Ignoring Mutations Because the Base Is Slow
A slow Mythical with a strong mutation will outperform a fast Rare with no mutation in raw displayed MPH once the modifier is active. The Mutation Hold slot exists for this reason. If you pulled a rare-tier pet with a good mutation, do not delete it for inventory space.
Trap 3: Riding the Starter Pet "Just for a Bit Longer"
There is no "a bit longer" with a starter. Every minute on a base MPH mount is a minute you are not earning at your actual ceiling. The moment a new pull outpaces your current mount, swap it in and keep moving.
Trap 4: Forgetting That Distance Is a Currency
Lifetime distance feeds your rebirth multiplier, and your rebirth multiplier feeds your future cash. A long, ugly loop on a slow mount is not wasted time — it is investment in the next curve. Keep the lap count high even when the cash feels thin.
Trap 5: Trying to Build a Full Team
There is no team slot — and that single design choice is the one most new riders get wrong in their first hour of Ride a Pet. You only get one mount seat, one mutation hold, and one storage box to work with, so every inventory slot has to earn its place. Treat the catalog like a museum exhibit you curate, not a roster you fill: bank the duplicate Foxglove you rolled at minute 12 instead of auto-equipping it, hold the Sprocket mutation until you find a Tier-3 Fast Hooves chassis, and resist the urge to swap your starter Burrower for the rarer Bat you just unlocked. That one hour of restraint is the difference between a stable that scales into the 30-minute mark and a garage full of mid components you cannot refit.
A Short Checklist for the First 60 Minutes
A clean first hour looks like this in practice: write the checklist into a notepad next to your screen, run it on your next fresh save, and compare your results to the table in the section above — specifically the 40 MPH mount bar and the Mutation Hold rarity threshold, which are the two numbers that actually separate a Mythical-tier session from a stalled grind. If your mount is still under 25 MPH at the 30-minute mark, the issue is almost always that you kept your starter too long and missed a free Uncommon speed swap during the first nest loop, so reset the run rather than over-correct with cash. Players who treat the 45 – 60 minute window as a hard binary — Epic push OR rebirth, never both — typically close the hour with the End-of-hour target met, while those who split their coins between hatching and rebirth usually finish with neither.
-
Minutes 0 – 10: Common spam only. Goal is a working mount and a feel for the nest loop. No cosmetics, no upgrades, no rebirth planning.
-
Minutes 10 – 25: Uncommon tier. Replace the starter the moment a faster Uncommon drops. Start your Mutation Hold slot.
-
Minutes 25 – 45: Rare tier. This is the speed spike window. Park your cash here, run dense nest clusters, and stop hatching the moment a Rare is in the active slot.
-
Minutes 45 – 60: Either an Epic attempt if you have the cash, or a rebirth push if you are close to the threshold. Do not split the difference — pick one.
-
End of hour target: At least one mount above 40 MPH, a Mutation Hold that is rarer than your starter, and a rebirth either completed or visibly in reach.
That checklist is the entire Ride A Pet best start strategy in one screen. It is the same loop the community uses on fresh servers, and it is the reason some players hit a Mythical in their first session while others are still grinding Uncommons an hour later.
Frequently Asked Questions
What should I do first in Ride A Pet when I spawn in?
Hatch a Common Egg immediately, then run a tight loop around the nearest two or three nests. The goal of your first ten minutes is a working mount, not a Rare pull. According to the official Ride A Pet page, every pet you mount exists to travel faster and unlock rarer eggs, so speed is the only stat that matters in the first hour.
How do I level up fast in Ride A Pet without wasting cash?
Loop the same nest cluster three times before moving on, and prioritize nests you can reach at your current MPH. This Ride A Pet speed guide approach keeps your cash curve ahead of your egg spending, which is what separates a sub-30-minute Rare from a 60-minute grind. A faster mount is the result of better cash, not more hatches.
Is the Rare Egg worth it in the first hour of Ride A Pet?
Yes, for most players the Rare Egg is the correct target between minutes 25 and 45. It is the cheapest tier that can produce a mount strong enough to outpace your Uncommon spike, and the cash you save by skipping Legendary attempts goes straight into your rebirth runway. Hold Epic attempts for your second hour, when your curve is more stable.
What is the best pet to keep as a Mutation Hold early on?
Keep the rarest pet you own, even if it is slow. A rare-tier pet with a strong mutation can outperform a fast common in displayed MPH once modifiers stack, which is exactly why the Mutation Hold slot exists. If you delete every slow rare you pull, you will have nothing to compare against once a Mythical finally drops.
Should I rebirth at the end of my first hour in Ride A Pet?
Rebirth at the end of your first hour only if you are within one short loop of the threshold. The rebirth multiplier compounds your future cash, but spending your whole hour on a pre-rebirth cash push when the threshold is twenty minutes away is wasted runway. If the threshold is far, spend the last fifteen minutes on one more Rare pull instead and rebirth at the top of hour two.